Has anyone made any bracket to mount a bus pirate to a 2020 extrusion? I could whip up one, but wanted to check first in case anyone has already done it. I’m currently using a big blob of tacky tack to hold it in place, but it isn’t very secure.
2 Likes
I had to look up what that is, but yeah, that would be cool ![]()
1 Like
You had to look up 2020 or tacky tack? ![]()
2 Likes
2020 ![]() I am not a mechanical person, and I was really late to the 3D printer game.
I am not a mechanical person, and I was really late to the 3D printer game.
1 Like
As the latest cases have screw inserts maybe could drill out so a bolt can pass all way through and attach a flanged washer to hook on extrusion?
3 Likes
I was actually thinking the exact same thing recently, only I was wondering if the case would need a change to allow the pass-through. I understand that the screw inserts are manually added at the factory … maybe a few can be made without the inserts added?
2 Likes
I was thinking of something simpler, like this…
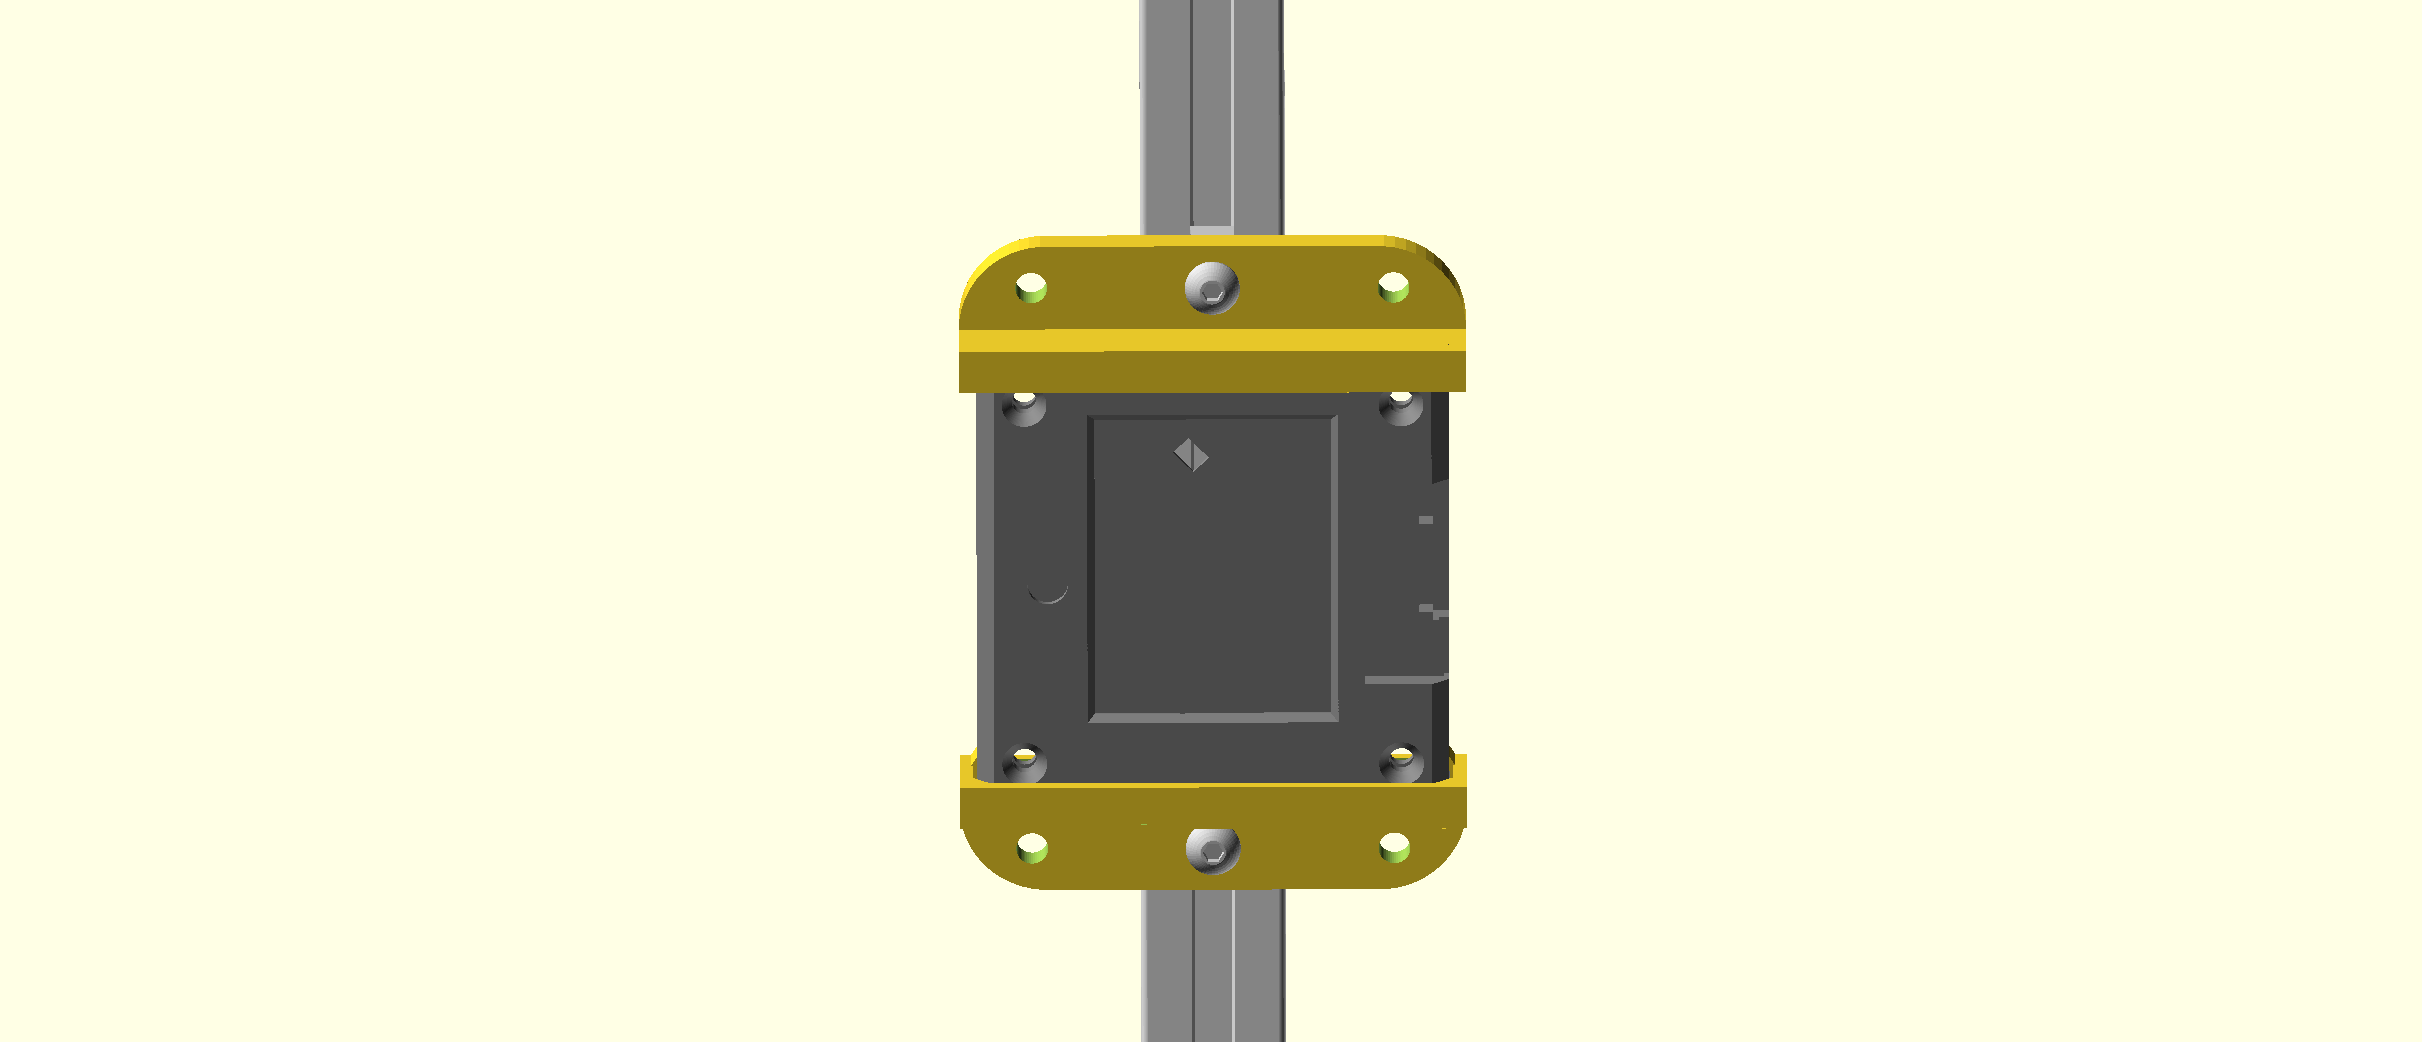

My printer is offline for a few days, I’ll print these out sometime this week and confirm they work. If successful, I’ll post the file online.
2 Likes
Id be glad to pront a sample and provide feedback and photos. I have 2 printers available. Otherwise, ill await the results. Looks good though!
1 Like
Looking good!
Will it fit both the old and new enclosure?
I haven’t kept up with the new enclosure. It would be best to make it fit both ones. Is there an openscad file for the new one?
1 Like
It was modified by the factory. I’ll post the step or stl if I can find it.
There are two functional differences that would effect the bracket:
- The corners are now rounded
- There are (optional) 1.5mm silicone feet in the four corners
yeah, a step file would help. The bracket I made was pretty simple, I took the scad file and used it with hull() to hog out a hole so there’s a little clearance (like 1 mm). I can make the hogged out cavity such that it can take either one. Like the silicon feet you mentioned, there can be a slot to clear them.
1 Like
2024 NOV 9 BP new enclosure SLA.zip (412.9 KB)
2 Likes
@ian , other than those changes, the injection molded case has the same basic outer dimensions (or “envelope”)? I presume the PCB assembly doesn’t change to accommodate the new case?
The sides’s profile was beveled on both top and bottom on the SLA(?) cases that I have. Does the new case carry on this same beveling?
If I don’t get my printer running by Wednesday I’ll send you the candidate file for you to test.
-Chris
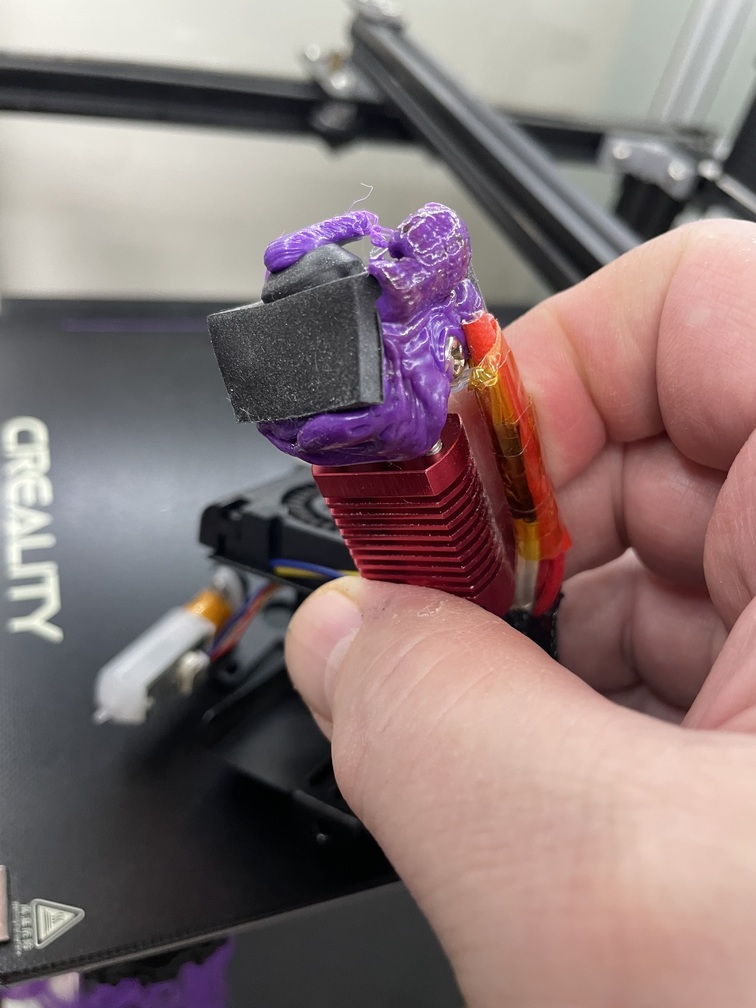
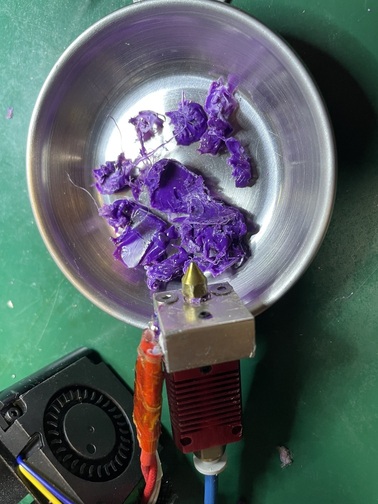
Here’s the small mishap that grounded my printer recently. I could probably salvage this one, but instead I now am the owner of a brand new so-called direct drive hot end for my almost-bottom -of-the-line cheap Chinese 3D printer (Creality Ender 5 pro). The new hot end came as a box of loose parts, so “some assembly required” as they say.
1 Like
Wow that’s a proper mess! How did that happen?!?
I have a prussa mini+. It wasn’t the cheapest but was less than my “disposable Chinese tool” (laser cutter, CNC mill, reflow oven, etc) budget of $400usd.
I about blew a gasket getting the Z axis dialed in right. Eventually I got a set of sparkplug gap shims to measure the nozzle height and then it was smooth.
I get it out a few times a year and it just goes. The biggest issue is filament absorbing water over time. I staple silica kitty litter into a few layer of coffee filters and put two in the bag with every reel. That can keep it fresh for 12 to 36 months.
2 Likes
Like you, once I zeroed it in, it ran reliably whenever I fired it up. Unlike you, I completely ignored moisture effects on my filament. That may be a contributing factor to my “crash”. I will order a couple of new spools today, and I also have like 10 unopened spools I can use in the meantime. Mostly I want to replace the black-colored supposedly ESD-safe spool of filament for use with PCB assemblies.
I also hated the bed leveling, Z-axis process. I think I have that under control with the BL Touch accessory, knock on wood.
3 Likes
I started out with a Maker Farm i3v that I built, then I got an Anet A8, and from there I got a Tevo Tornado 300*300 * 400mm (The green one). I gave the Maker Farm away, but I still have the Anet (somwhere…), and the Tevo Tornado on my workbench. I haven’t printed anything in over a year though. The Tevo developed a bad habit of not being able to print small vertical pieces - It’s likely an issue with temperatures, and possibly using cheap filament.
I have a BL Touch for the Tevo, but I still break out the feeler gauges and level it myself - I guess I’m a glutton for punishment!
1 Like
If anyone needs parts, I have a new authentic BL touch, thermocouples, extruders, nozles, thermal boots and A LOT more.
I’m in the U.S., so IDK how much sense it would make to ship out of country unless you need a bunch of things, but i just wanted to offer for anyone who may run across your work of art.
3 Likes