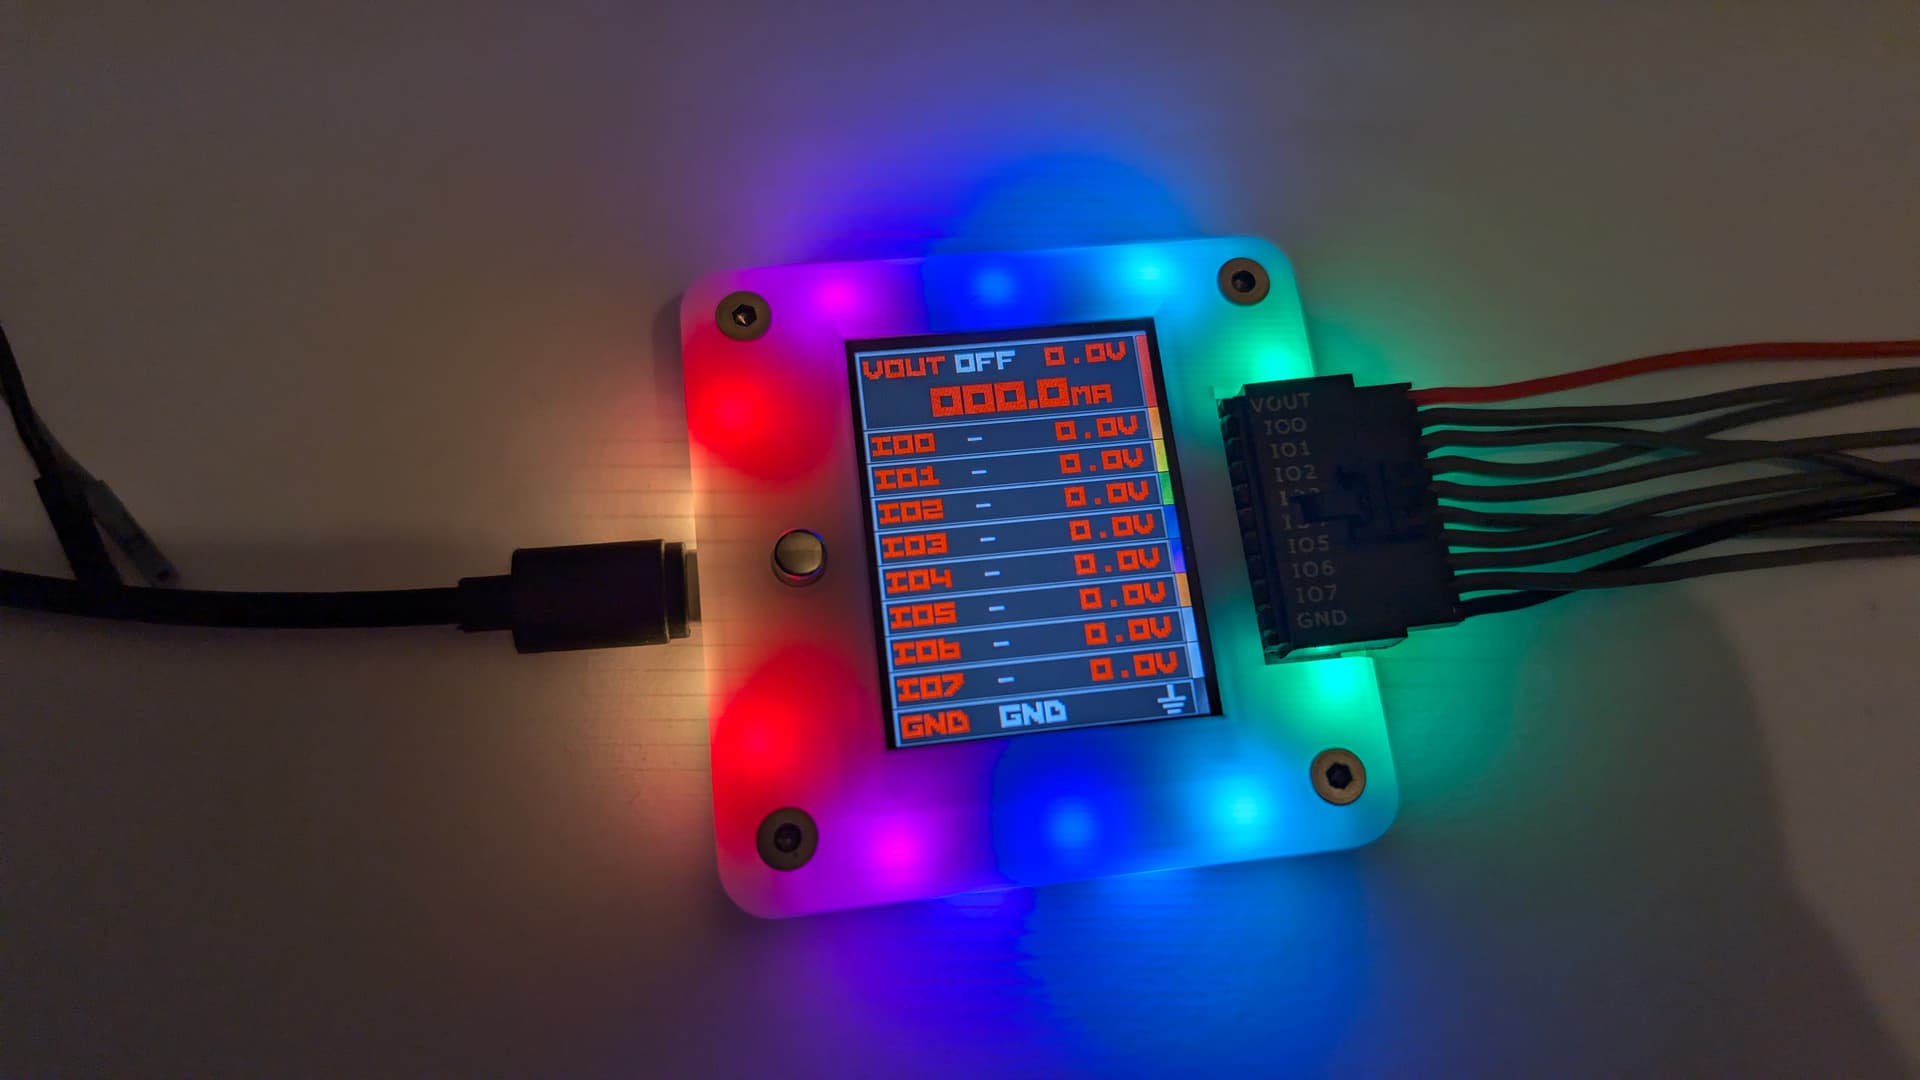
Very pleased with the AUX area rework, I think it was worth the extra back-and-forth to get it right. (I had enough and said it’s good as is, but @jin and the office insisted on a few more updates)
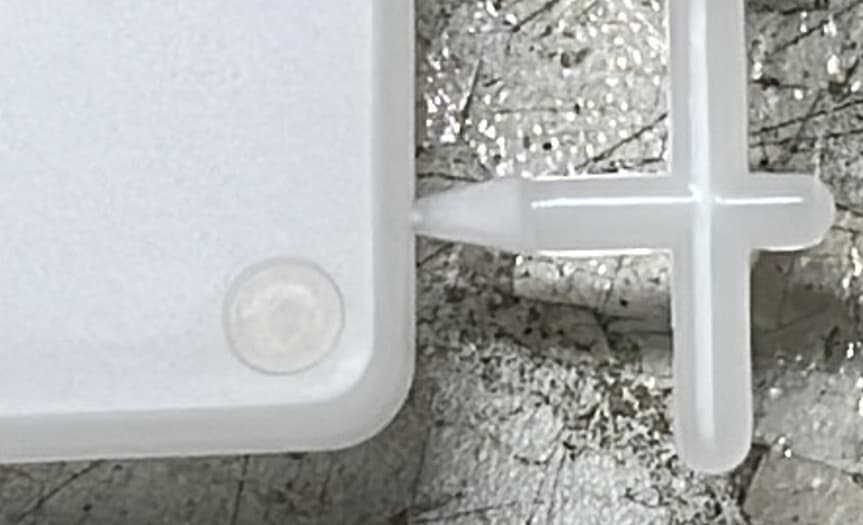
The see-through is neat, but I worry it won’t diffuse the onboard pixels, making them eye-blinding when trying to also look at the screen.
Consider checking how the diffusion works for the major colors:
Red, Green, Blue (one set to 0xFF, two set to 0x00)
Cyan, Yellow, Purple (two set to 0xFF, one set to 0x00)
White (all three set to 0xFF)
If you would prefer one of the more transparent options, but the diffusion isn’t great for the screen-facing pixels, there’s still another option… Try it with a prototype that uses all side-facing pixels? It might be just the catalyst that makes the pixel change worthwhile.
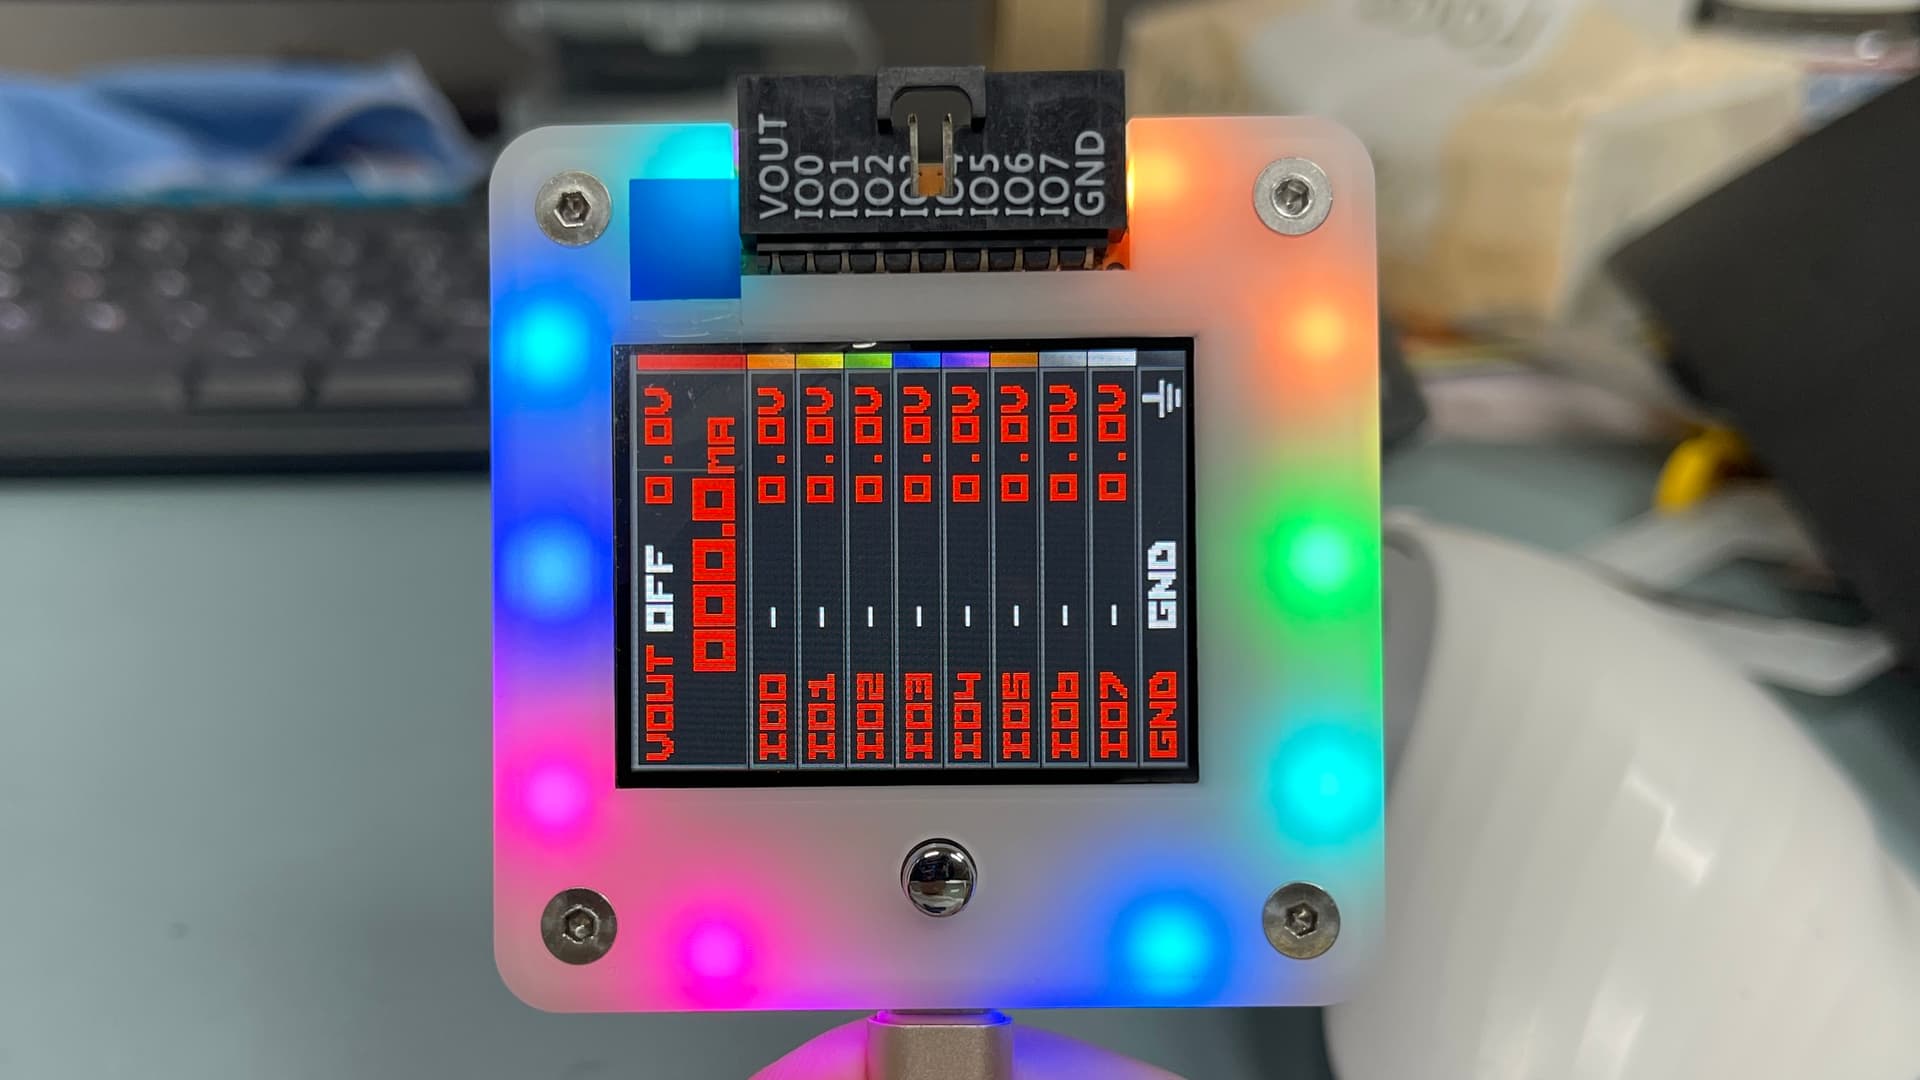
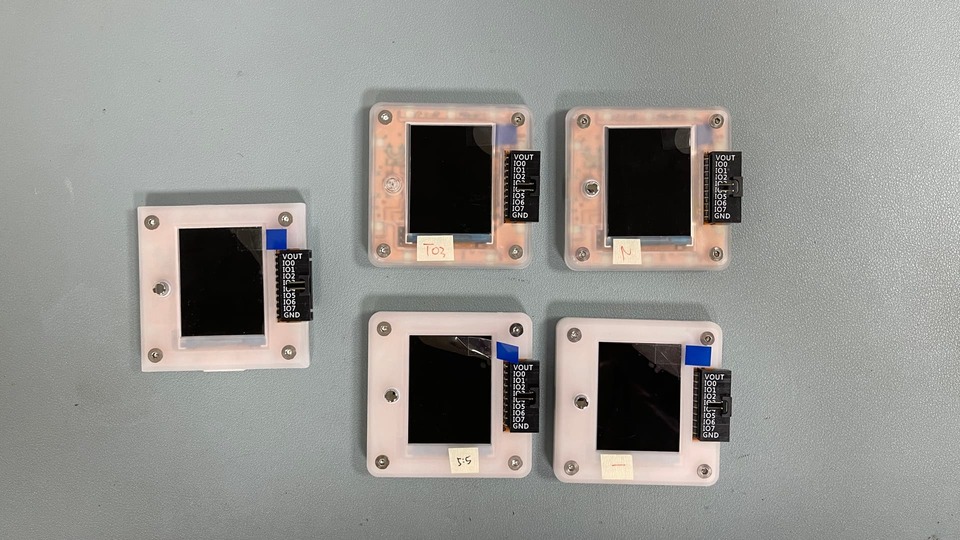
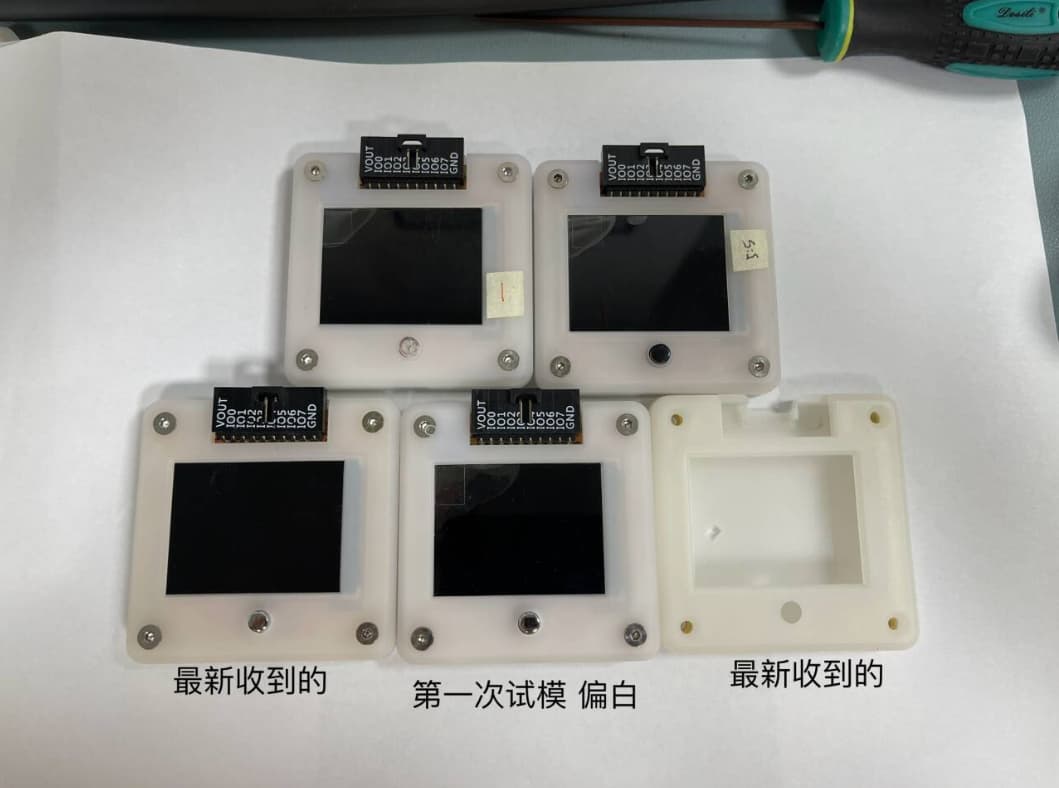
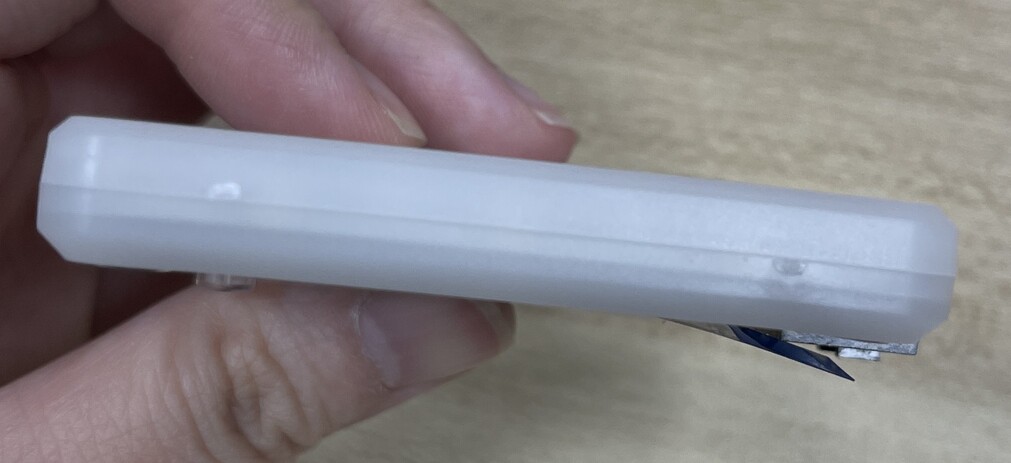
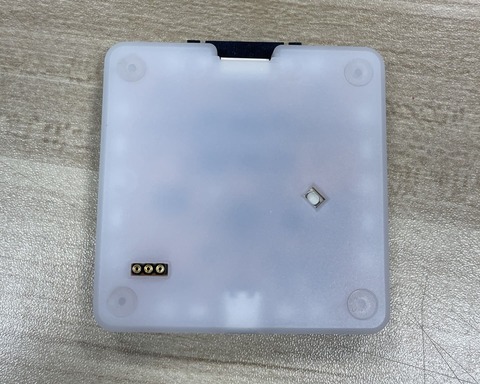
Received the enclosure color samples and have been trialing them for a few days. The whiter one has the best diffusion effect we’ve ever managed. I actually like it a lot.
The hot spots you see in the photo are barely noticeable in real life.
So any chance you’d be selling these to those of us that already own BP’s but want better access to the aux cable (without modifying the current case or printing new ones)? The feet would just be a delightful bonus of course…
Of course! Marginal or no cost, just cover shipping!
We need to see where we land once all is said and done, but the new case will definitely be available.
I even hope it is useful to other projects and we can let them use our tooling at no cost. We will never wear it out in the next year before we reroll again.
This round of tooling and samples is finally over and an initial production run is scheduled for this Saturday:
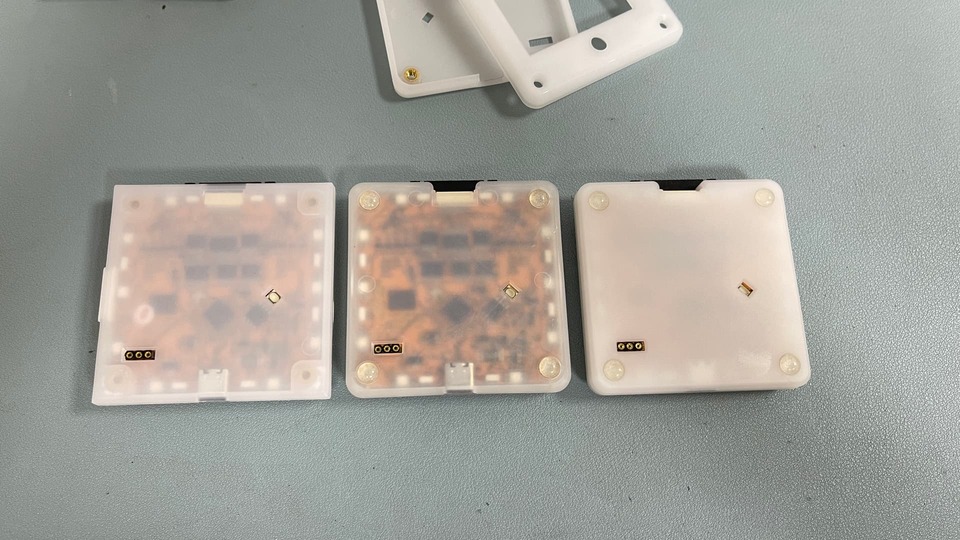
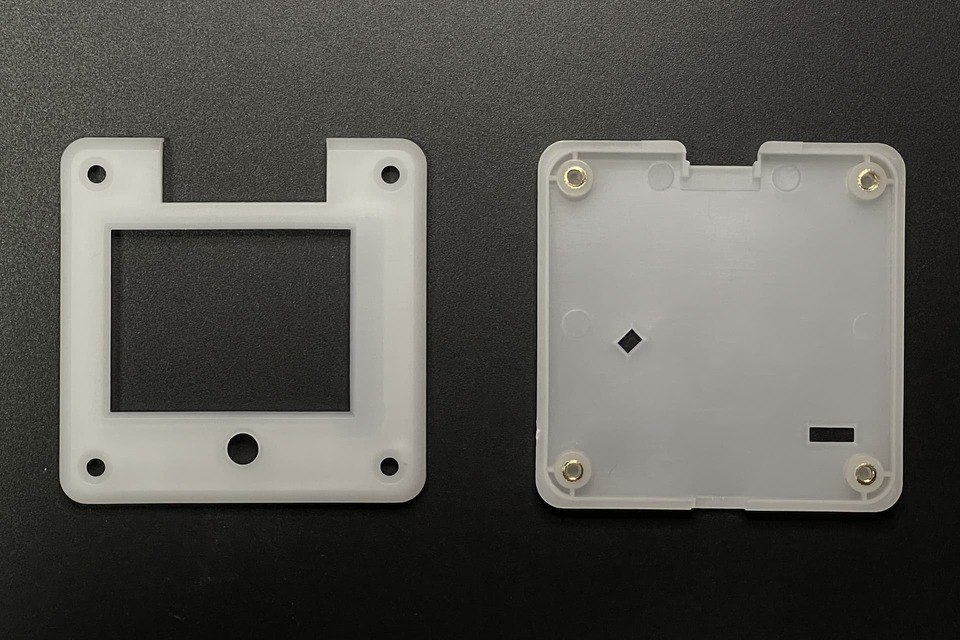
We’re using a 70/30 mix of a white and transparent PP material
No additives (diffusion powder or strengthener) because they caused an unsightly yellow tinge to the case (bottom right)
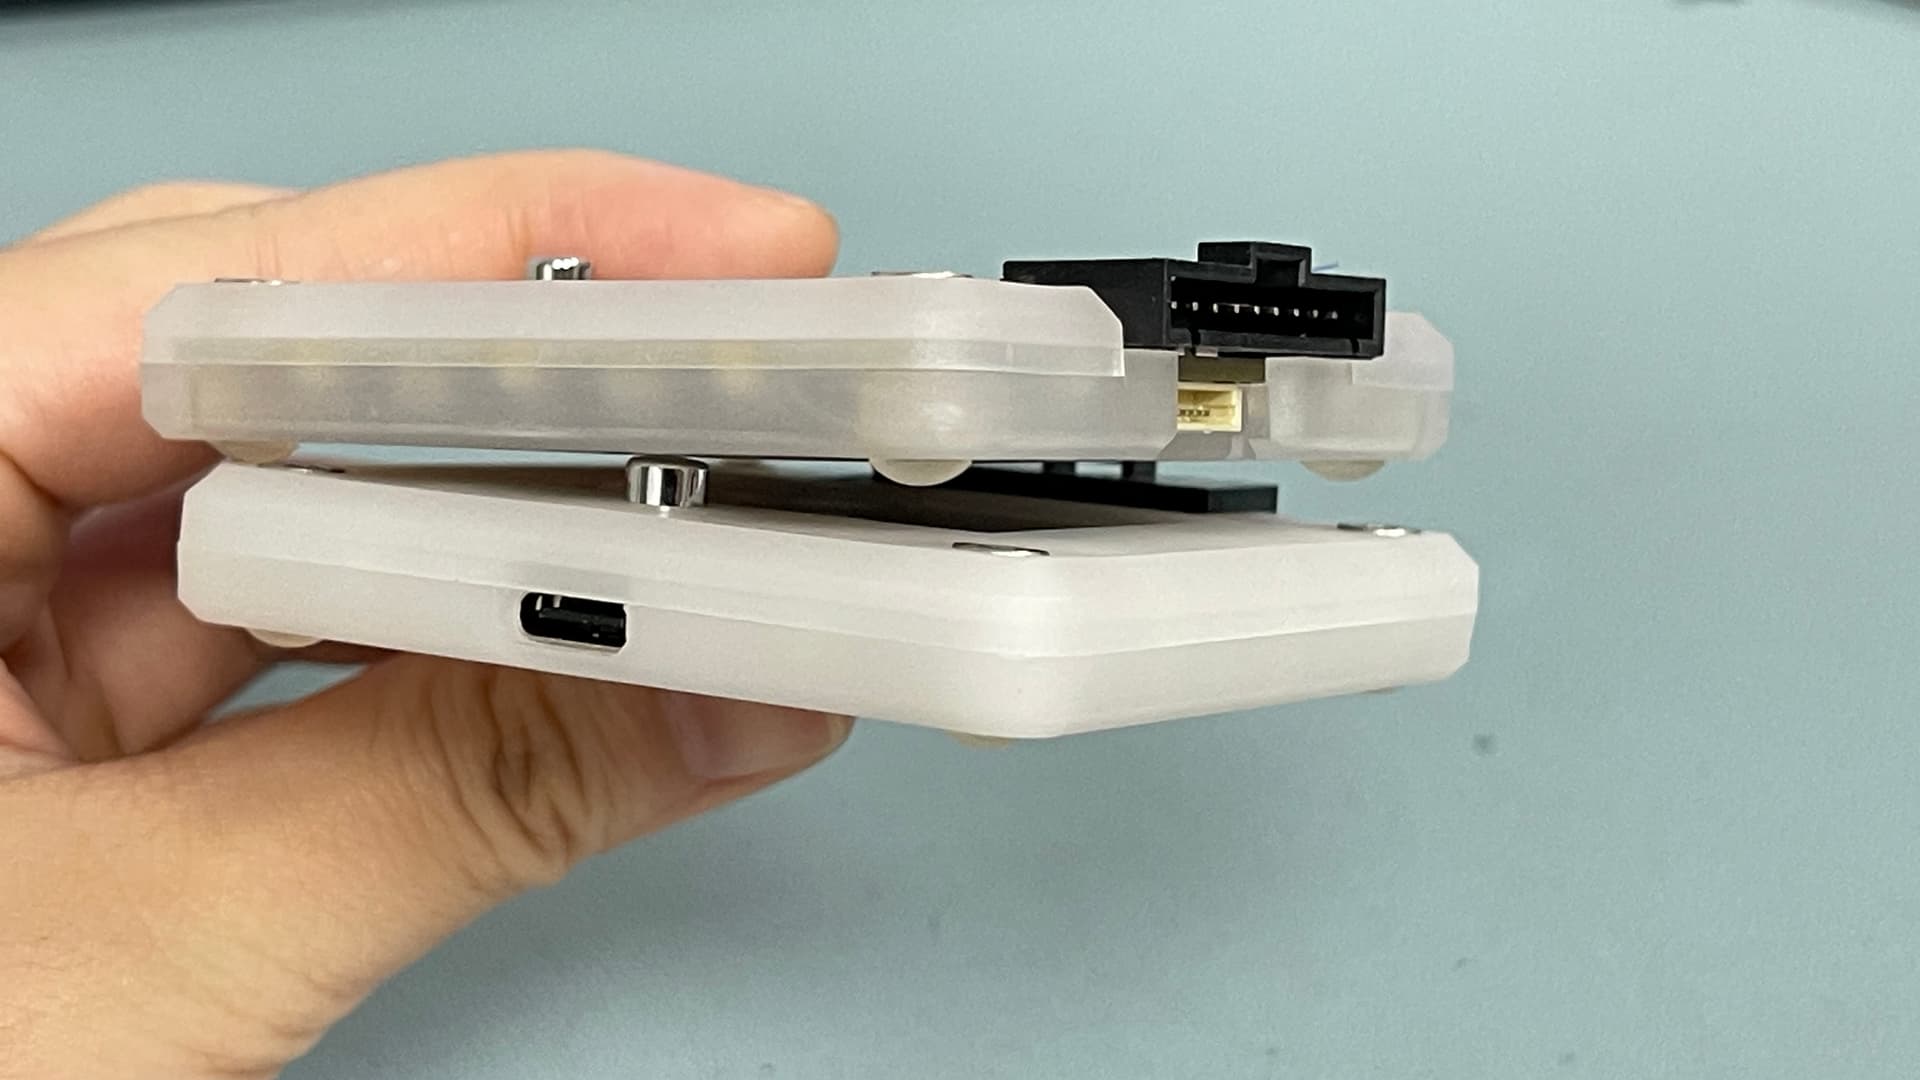
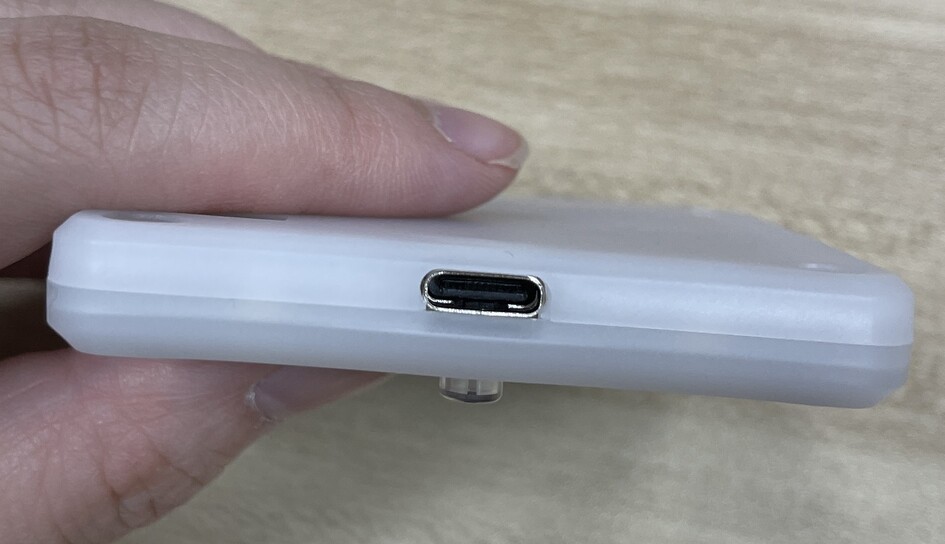
There is an ever so slight gap on the USB connector side where the two halves meet. This has been diagnosed as the pins that eject the part after molding are not exactly the same length. One side of the case is being pushed a little sooner than the other causing deformation. The solution is to polish 0.1mm off of the longer pin.
The final test moldings had some black material on the inside surface around the ejection pins. The tooling will get a good cleaning.
Tomorrow we will pay the remaining tooling fees and for the initial production run. On Saturday they will clean, load, and heat the tooling. Jam (from our office) will go to the factory to approve and sign off on the “final look and feel” of the initial production. We should have plastic on Monday or Tuesday of next week
The factory suggested an initial batch of 500 as a test. We’ve requested 1500 instead. 1000 for the batch of Bus Pirates in production now, and 500 for folks who what to swap out their current case.
This injection molding experience has been much more pleasant than the first. I would rate it “very good”. The factory was hands on and proactive, lots of communication. However, it just seems to be a fact that injection molding is a pretty slow process and it takes a LOT of back and forth to get everything sorted. The first post in this thread was in October, and we’re going into production the first week of January.
My biggest “lesson learned” is that I would have gone in with a production ready design. The factory offered to make modifications to the current design, but there were weeks and weeks of delay getting the AUX connector area completed. I think the factory had good intentions, but probably not the resources to do this for us as a freebie. Instead, I would have hired someone on Fiverr (or whatever) to make the changes, test them with 3D prints, and hand a completed design to the factory. I think this would have saved about 4 weeks, maybe more.
If you’ve been following along, thank you so much! I hope this gives some sense of what it’s like to do a small injection molded enclosure. Cases will be available at DirtyPCBs as soon as we get them, and store.buspirate once the Medusa guy returns from holiday and fixes the payment stuff.
I think the case you have now is a very good example of a simple and small electronics product case. I currently don’t have an immediate need for something like this, but it would be nice to have a rough idea of the prices involved.
Do you want to share the prices you paid? Maybe not publicly but in a private message?
Like what did you pay them for improving the 3D design? What did you pay for having the tooling created? What do you have to pay for 1000 pcs. now that the tools are finished?
I guess to use a Chinese injection mold company like this it is very much preferrable to have someone you trust located in Shenzhen that they can send samples to and that can go and have a look at the production run like you mentioned. Is this a service Dangerous Prototypes offers? Or would I have to look somewhere else for something like this?
I think I don’t mind sharing publicly. Bearing in mind we have a small and simple design with no funky holes that need pneumatic pins or anything, the most basic surface treatments, etc. Also: we have a year long relationship where the boss helped us deal with the “bad factory”, so theres a pity/friend price. As always, if you go in speaking English prices are bound to double to cover the extra work that involves. Also, this is off the top of my head.
Tooling is in the range of 3000usd to 4000usd.
Modification to the design was free (get what you pay for).
We did an abnormal amount of test moldings and I think that’s going to be about 50 to 300usd per test when the dust settles.
At MOQ 4000 the cases are about 0.50usd each. For smaller runs it’s still the MOQ price, so about 2000usd. This first batch of 1500 works out to 1.30usd each. *
I will see an itemized bill at some point tomorrow, but the total we’ve paid/owe is in line with what I expected going in.
*Why not do MOQ if the price is the same? Factory encouraged a small first batch and based on experience this is the way to go. We make sure everything is OK, catching errors like the “bad factory” first batch with a chunk of the wall missing. It saves the factory time and materials if they have to remake the initial batch. We can do tweaks to materials sooner if we aren’t quite happy or get user feedback. Very important to me: if something goes wrong we aren’t putting 4000 bits of scrap plastic into the waste stream.
If you want to do injection molding, have a final design, and have a budget, you could contact @jin here or flylin.co. He coordinated all of this, and also has the dirtypcbs infrastructure available for currency control, shipping, etc. Whatever you do, do not go on aliexpress or taobao, we found nothing but unscrupulous agents and dodgy referals to “a friend’s factory” that wanted 5 to 10 time what I knew to be the going rate.
i will purchase i think 5 of em. i have dev revision, 5.8, three, 5.10 and a six. but i really really want some Camouflage. i am kidding but i can wait on it, i like features more than cases. i keep different firmware on them, i keep one in my car, it actually came in handy doing some logic analyzer work on crappy chip in a tv that i was trying to fix at my parents hahaha
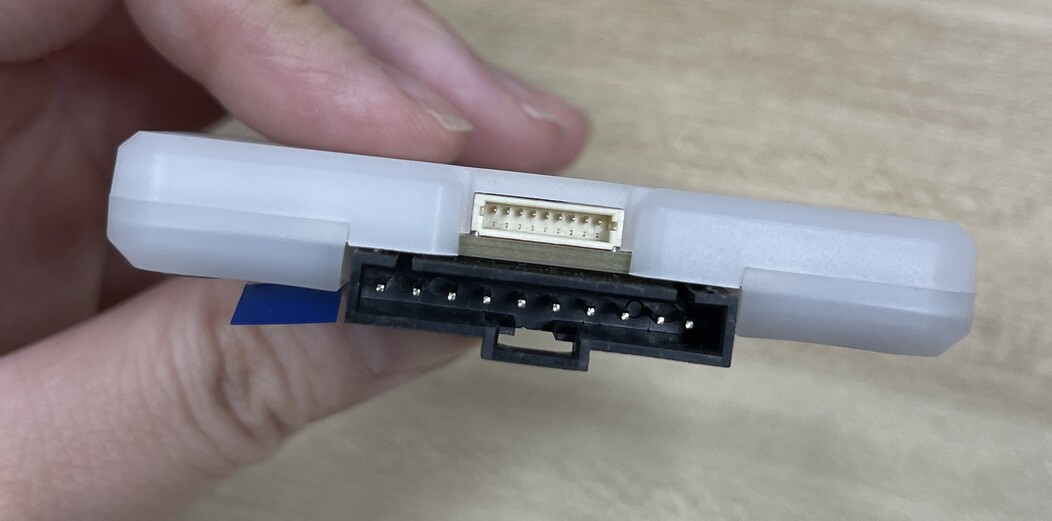
Unfortunately the probe cable is the only one we can do with color coded wires because it is a pretty common size. The tiny AUX wires don’t seem to be available in the full rainbow.
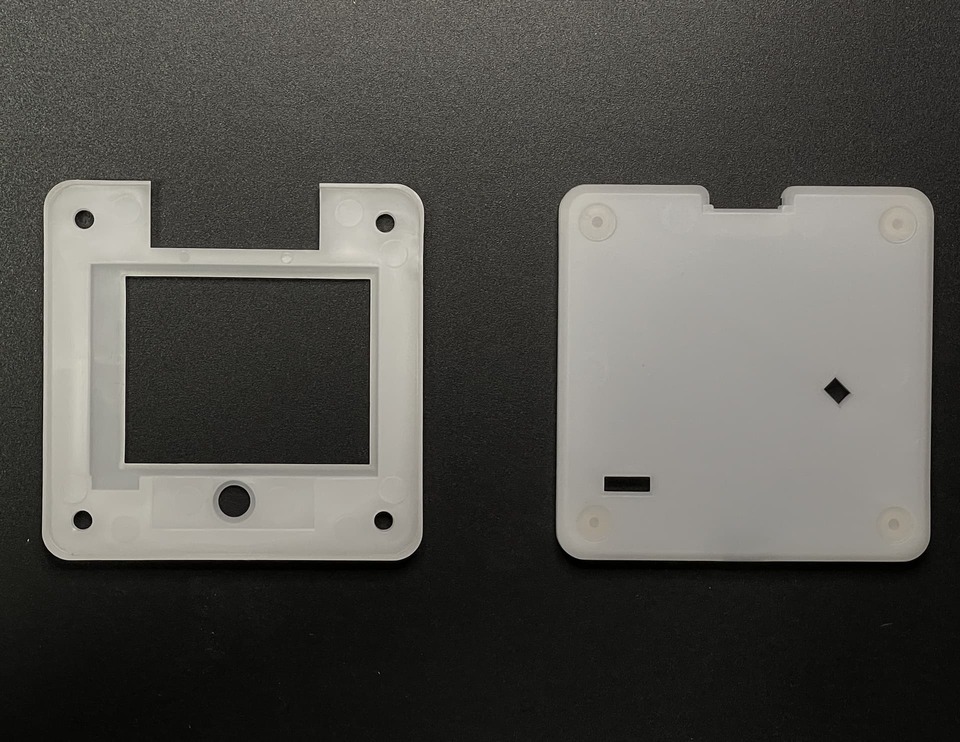
This is the “signed final” version of the case! Jam did QC on a small batch and found the perfect one, then she literally signed it as the “golden sample”.
I’m sorting through a ton of factory photos that will go up in a bit.
The enclosure is going up in the store right now. Do you want an extra 4 bolts and HEX wrench? I figure most people here have that figured out, but I don’t want them to arrive and not be immediately useful. We could make it optional, but that adds an opportunity for us to mess up orders.
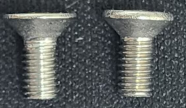
Speaking of opportunities to mess up, the bolt factory sent us slightly odd DIN7991 bolts a second time.
The one on the left is nice and flat, the one on the right has a bumpy head that sticks up. They always exchange them for the right one, but I wonder if this is actually an separate part number or if they did a bad/custom run and are trying to dispose of stock.
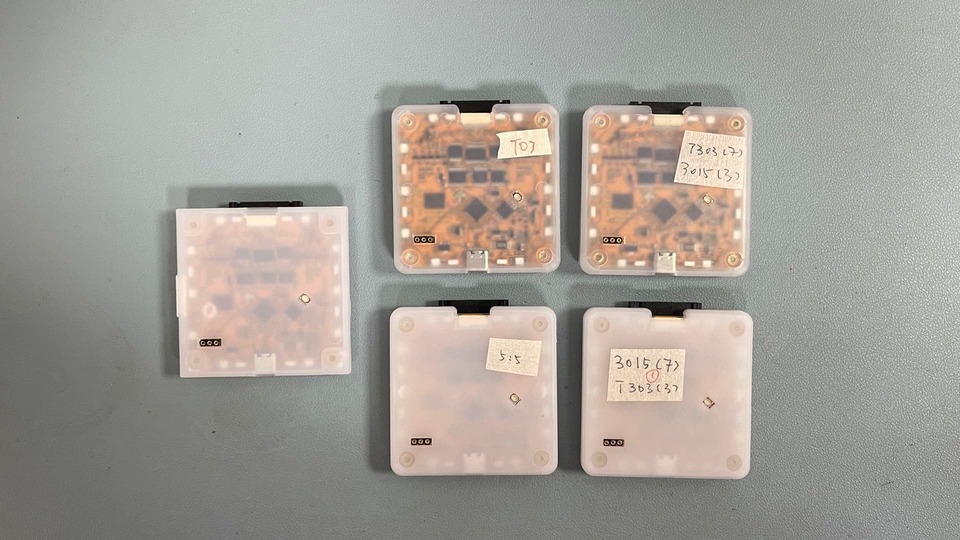
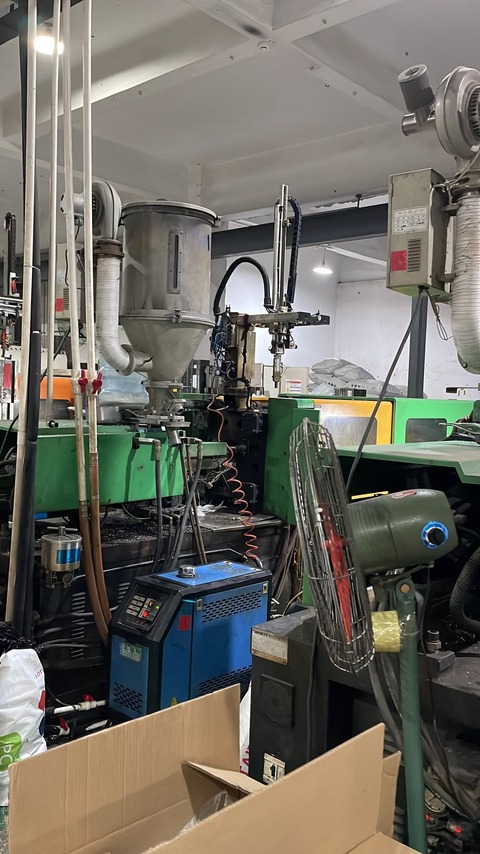
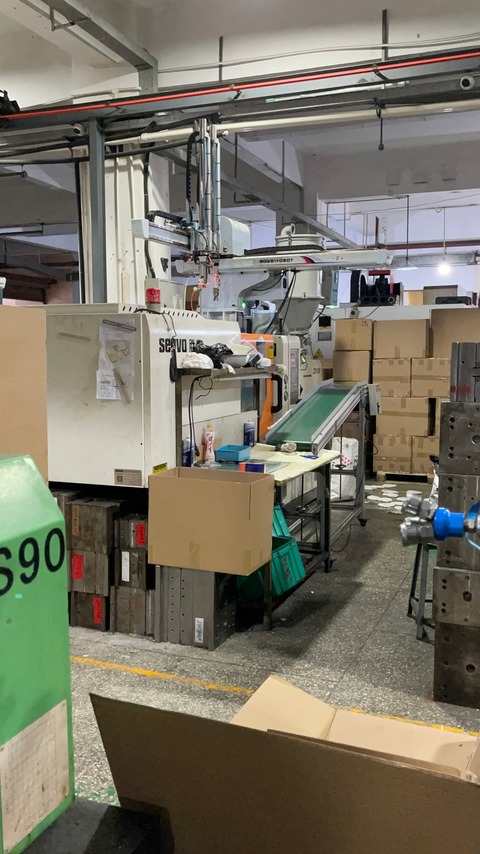
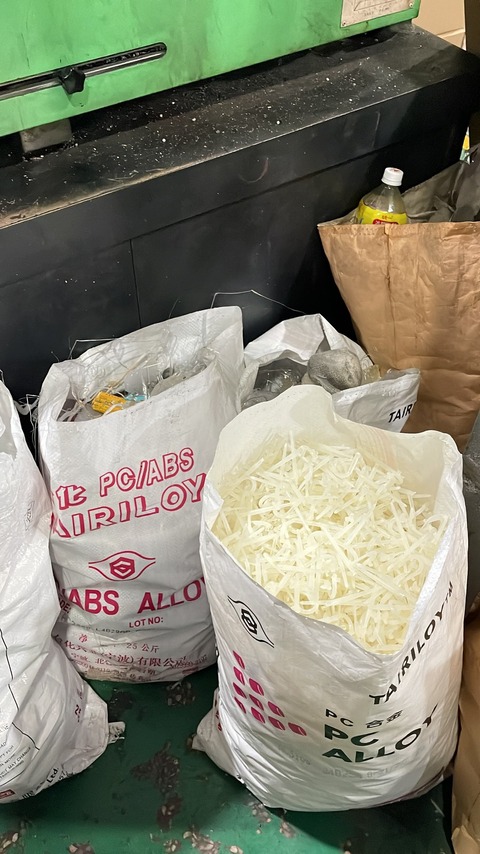
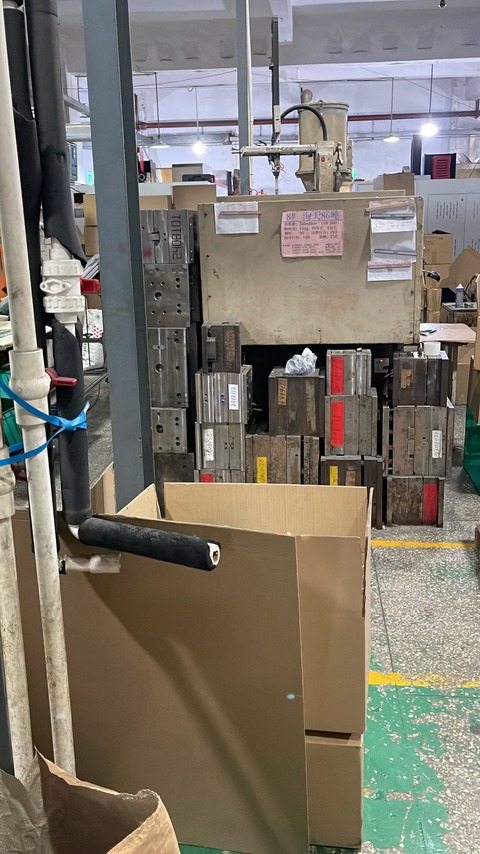
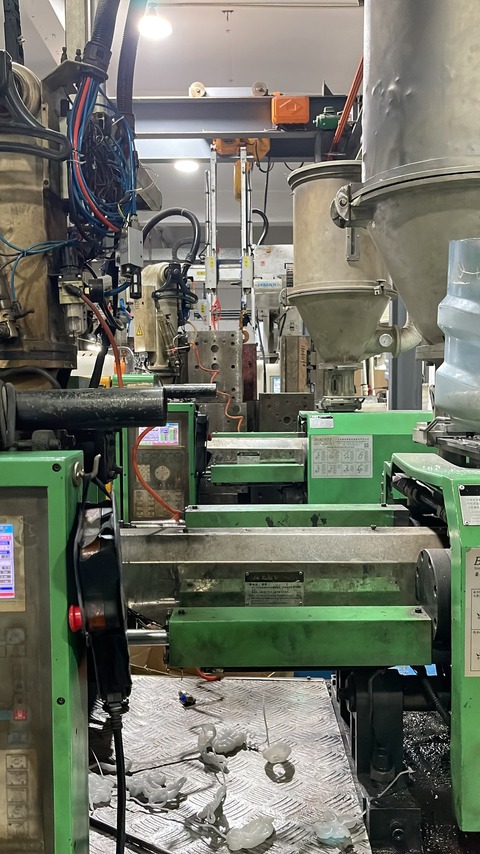
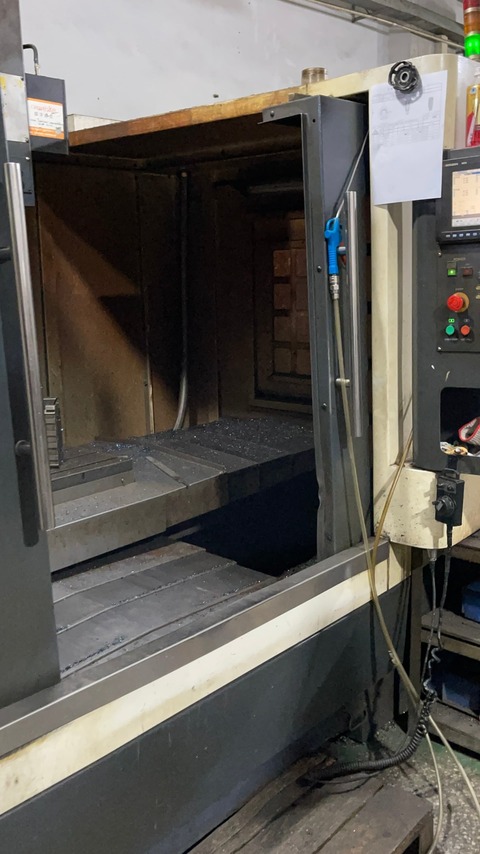
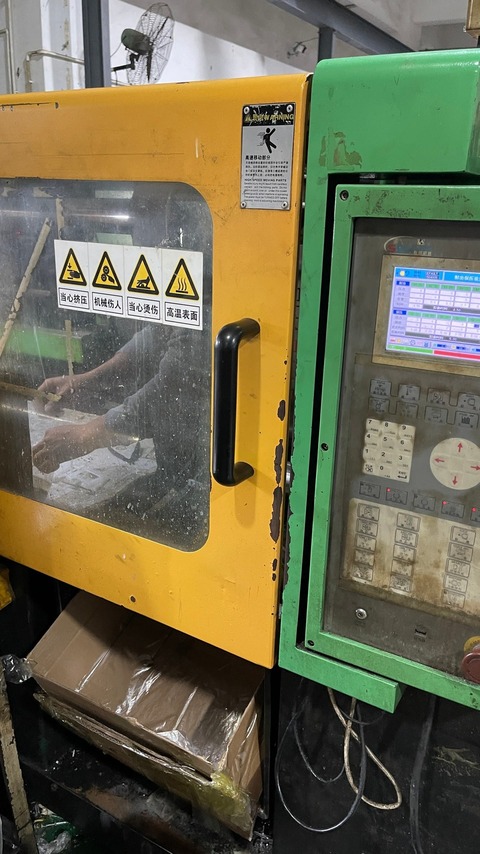
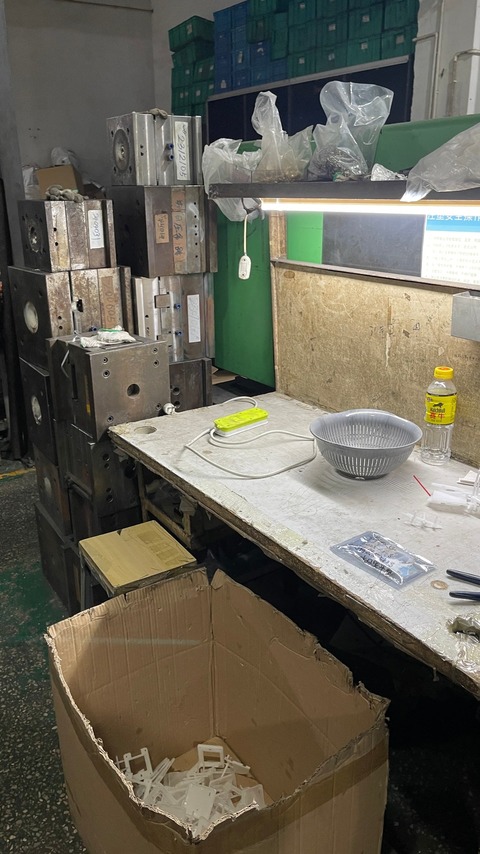
Some small injection molding machines. Quality control station. A nice pile of tooling. More injection molding machines, the hoppers at the top are where the plastic pellets feed in. Bags of the waste material that cools in the channels that supply plastic, it is cut off by hand after cooling.
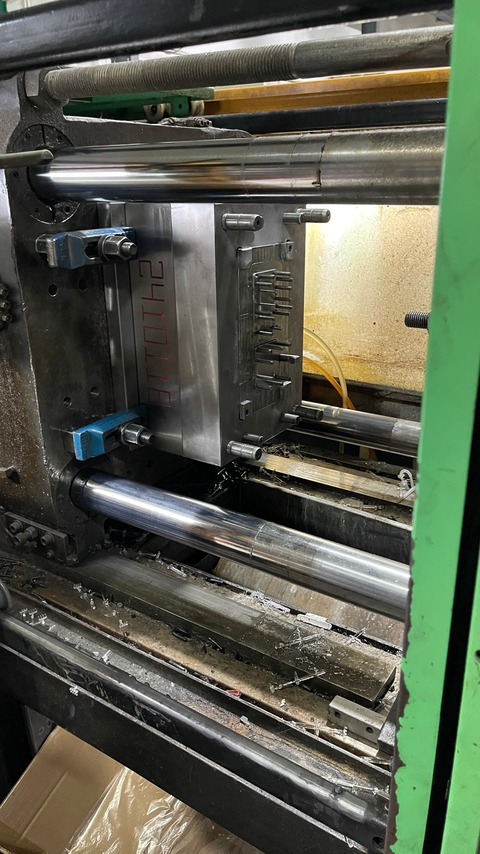
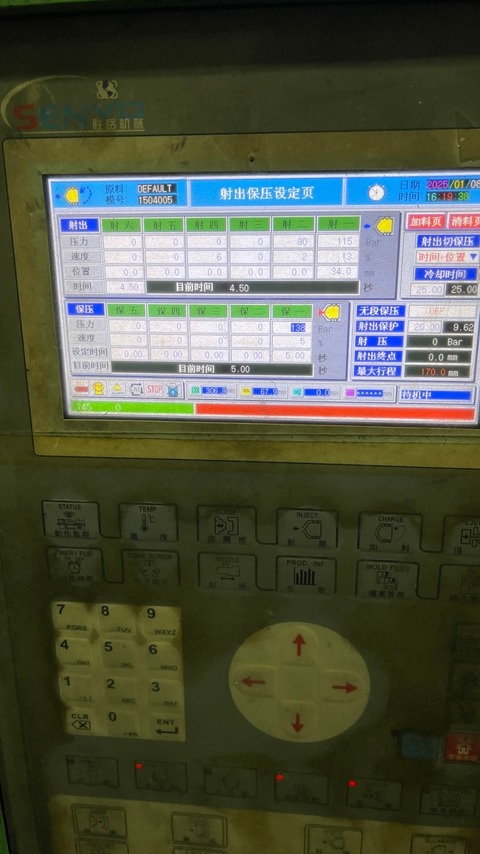
This is the enclosure tooling loaded into the mold. The spikes are the ejector pins that push the finished piece out at the end. The screen shows the exact pressure, temperature and time settings we determined over the last few months.
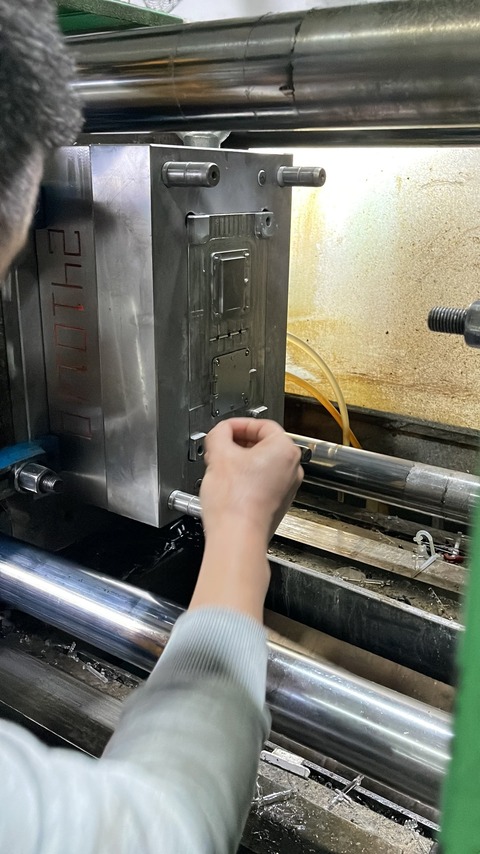
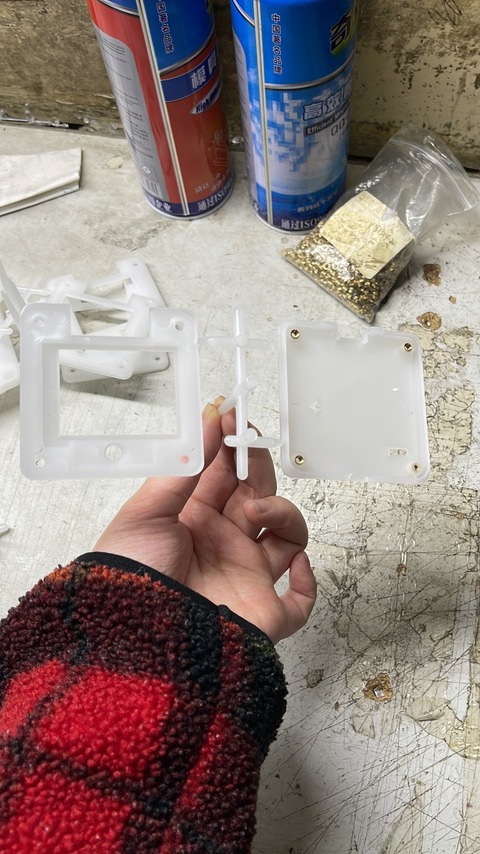
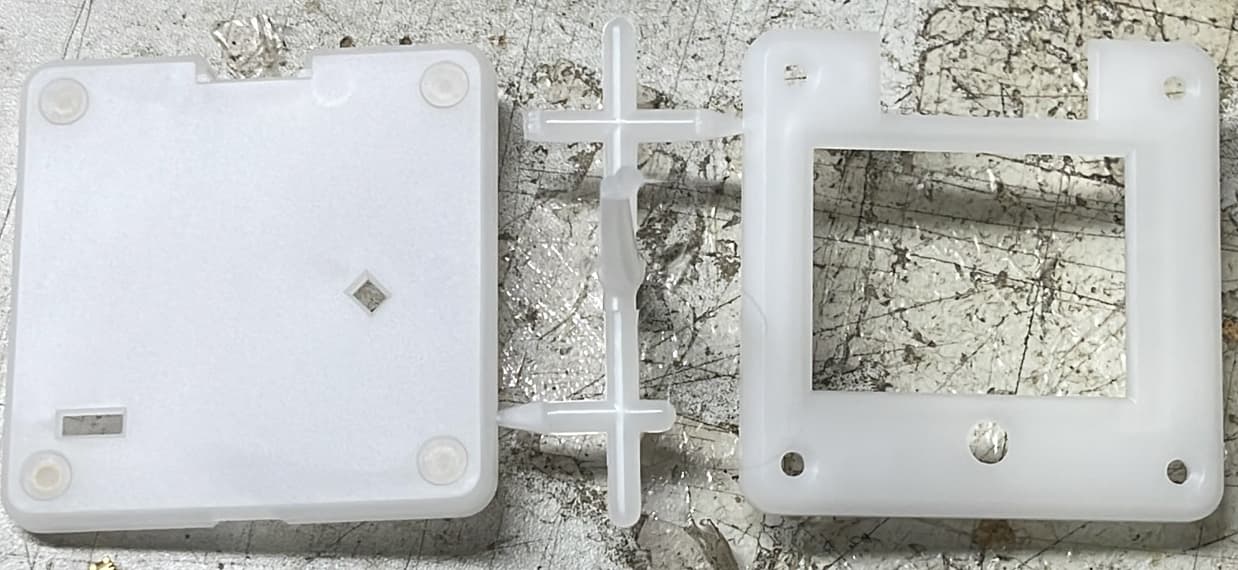
Nuts are placed manually in the mold. The door shuts and plastic is injected. After a minute the piece is complete. You can see the excess material connecting at the gate in each half, that has to be removed manually.
Ru (Jam) is super strict about quality control. In the box you can see the waste from warming up the tooling before she accepted the “golden sample”. Also, nice casual stack of tooling in the background.
The enclosure v2 is now live on Dirty PCBs, but please give us up to a week to start shipping. The factory cut strips of feet are still on the way, we still need to do quality control and then kit up the parts.
This is a “private” announcement via the forum only. We’re not blasting this on social media yet. The price will probably increase a bit when we get to that point.